


The process:
Take 1x 18" length of C&L '00' gauge flexitrack
Remove plastic webbing with a scalpel and widen sleepers to proper 4mm scale spacings (personally I prefer this despite the narrower gauge of 00 rails since at normal side-on viewing the gauge is less apparent anyway)
Glue to base. Leave to dry.
Create dummy rail joins at scale 60' intervals by cutting the head of the rails and super-glueing C&L etched brass fishplates to the rail sides. Ensure the 2 sleepers either side of the joins are spaced closer together.
Mix a sleeper colour using black, orange and light grey in ratio of approx. 1:3:1.
Paint sleepers and base. Leave to dry.
Mix rail/chair colour using black, orange and white in ratio approx. 1:5:3.
Paint rail sides and chairs. Leave to dry.
Using a small (1/8") flat brush liberally apply a 4:1 mix of PVA and water to the base between the sleepers, around 10 or 15 sleepers at a time, but making sure not to get the glue on the rails or tops of the sleepers.
While glue is still wet, sprinkle a generous portion of Woodland Scenics fine light grey ballast over the track until the sleepers are covered and rails almost buried.
Immediately shake or vaccum off the excess ballast, which can be resused.
Repeat until whole length of track is ballasted.
Leave to dry. Ensure freshly applied ballast is not disturbed until glue has dried completely.
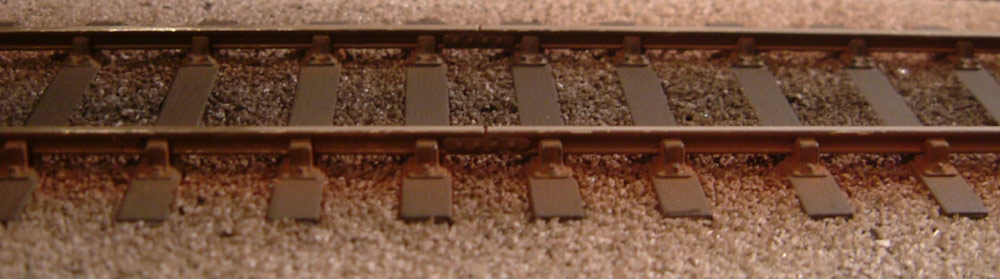
Using a large (1/2") brush, brush off any loose ballast and vacuum entire trackbed.
Remove any paint from top surface of rails using a scalpel blade or abrasive, then polish with fibreglass pencil.
Weather the ballast using Carrs weathering powders rust and coal tones.
Sit back and admire!
I've spent a good few hours on this one 18" length of track and while I'm sure I will get quicker with experience (I found at each stage I got quicker as I went along) the biggest lesson I've learned so far is to take my time! Care and attention to detail at the painting and ballasting stages are essential to avoid a messy appearance. And as I've discovered, the key to using weathering powders is patience, building up the effect litte by little in almost imperceptible stages; a moment's haste or heavy-handedness spells disaster! (Thanks to Chris Baker, builder of 'Much Meddling' for valuable advice on this last point.)
No comments:
Post a Comment